
How to Fabricate a Black Porcelain Dining Table: Tools, Cutting & Finishing Tips
Fabricating a dining table using black porcelain slabs requires precision, the right tools, and an understanding of how porcelain behaves during cutting and finishing. As porcelain becomes the material of choice for modern dining tables—thanks to its durability, stain resistance, and marble-like elegance—fabricators and furniture manufacturers must be equipped with the correct techniques.
If you're looking for expert guidance on how to cut porcelain slab, edge-finish it, reinforce it, and prepare it for table applications, this professional guide will walk you through every step.
Why Porcelain Is Ideal for Dining Tables
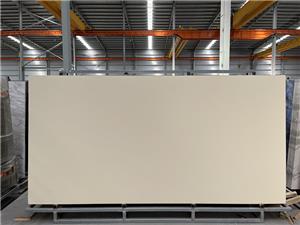
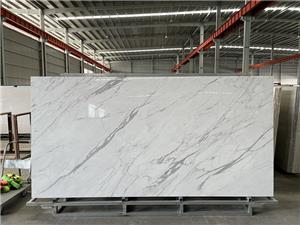
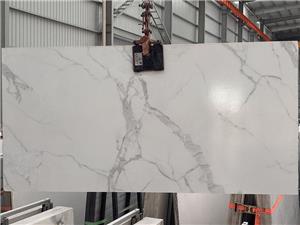
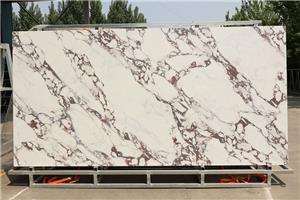
Porcelain slabs—especially 800×2600×15mm matte black slabs with gold veining—offer advantages over marble, granite, quartz, and wood:
Zero water absorption
Scratch-resistant
Heat-resistant
Stain-proof
Lightweight yet strong
Easy to fabricate into tables, bars, and countertops
Porcelain’s durability makes it ideal for high-use dining environments, but its density also means precision cutting is essential.
Step-by-Step Guide: How to Fabricate a Black Porcelain Dining Table
1. Selecting the Right Porcelain Slab
Choose a slab that fits the table’s dimensions and style:
Recommended size: 800×2600×15mm
Finish: Matte (easier to maintain, hides fingerprints)
Design: Black with gold veining for a luxury marble effect
Inspect the slab for flatness and color consistency before fabrication.
View the product page for our premium black porcelain slab (800×2600×15mm).
2.Tools Required for Cutting Porcelain Slabs
Working with porcelain requires professional-grade tools due to hardness and density.
Essential Tools:
✔ Bridge saw with porcelain-specific diamond blade
✔ Waterjet cutting machine (ideal for custom shapes)
✔ Angle grinder with continuous-rim porcelain blade
✔ CNC router with diamond tooling
✔ Diamond polishing pads (for edges)
✔ Suction cup lifters
✔ Reinforcement mesh + epoxy (optional for large tables)
3. How to Cut Porcelain Slabs (Professional Guide)
Porcelain is extremely hard (Mohs 7–9), so using the right technique ensures a clean, chip-free edge.
A. Using a Bridge Saw (Most Common Method)
Use slow, steady feed rate
Continuous water cooling
High-speed rotation with a porcelain-rated blade
Support the slab fully to prevent breakage
Keep the blade sharp and replace when dull
Tip: Start with a light scoring pass, then cut fully.
B. Using a Waterjet Machine (Best for Custom Shapes)
Perfect for:
Ovals
Curved edges
Holes for metal legs
Artistic shapes
Waterjet creates a smooth finish with almost no chipping.
C. Cutting with an Angle Grinder
Used for small adjustments or onsite corrections.
Use a continuous-rim diamond blade and keep the grinder stable.
Not suitable for long cuts but helpful for detail work.
4. Drilling Holes for Table Bases & Metal Brackets
Use a diamond-core drill bit with water lubrication.
Start at a 45° angle
Gradually move upright
Drill slowly
Do not apply sudden force
This prevents cracking and maintains structural integrity.
5. Reinforcement for Dining Table Fabrication
Although porcelain is strong, thin slabs used in table applications often require reinforcement:
Methods:
Fiberglass mesh backing
Aluminum honeycomb backing
Steel frame support under the slab
For a 15mm slab, reinforcement ensures durability during heavy use.
6. Edge Finishing Options for Porcelain Dining Tables
A. Straight Edge (most common)
Clean and modern—ideal for contemporary furniture.
B. Mitred Edge
Creates a thicker edge appearance (30mm+).
Perfect for premium dining table designs.
C. Curved or Beveled Edges
Requires CNC precision tools.
Polishing Tips:
Use diamond polishing pads from 50 to 3000 grit
Keep polishing wet to avoid overheating
Match the matte finish texture
7. Mounting the Slab to the Table Base
Base Options:
Metal frames (black steel, brass, brushed gold)
Wooden bases
Sculptural or artistic bases
Attachment:
Use structural adhesive specifically for porcelain or stone
For commercial tables, mechanical fasteners may be added
Ensure even weight distribution across the base
8. Cleaning & Finishing the Table
After fabrication:
Remove any dust with mild detergent
Avoid acidic cleaners only during fabrication (post-install, porcelain is chemical-resistant)
Inspect edges and weld points
Porcelain requires no sealing—making it easier than marble or quartz.
9. Common Fabrication Mistakes to Avoid
⚠ Cutting too fast → causes chipping
⚠ Using the wrong blade → cracks the slab
⚠ Unsupported slabs → break during transport
⚠ Dry cutting → overheats and creates microfractures
⚠ Polishing edges without water → burns finish
Proper equipment prevents these issues.
10. When to Use Professional Fabricators
Large-format porcelain requires expertise.
If you're manufacturing:
Custom dining tables
Restaurant furniture
Hotel and office tables
…professional fabrication ensures a flawless final product.
Final Thoughts
Fabricating a black porcelain slab dining table is absolutely achievable with the right tools, techniques, and planning. Porcelain’s strength, visual appeal, and resistance to stains and scratches make it a superior choice for modern furniture manufacturers.
Whether you're producing high-end residential dining tables or commercial-grade restaurant pieces, porcelain delivers long-term performance with luxury aesthetics.
Explore Our Black Porcelain Slab for Dining Table Projects
Our premium slab features:
800 × 2600 × 15mm
Matte finish
Gold veining
Lightweight and fabricator-friendly
Ideal for modern dining table production
View the product page: Black Porcelain Slab – Gold Vein, 800×2600×15mm
Contact Us for Fabricator Pricing & Bulk Orders
✔ OEM/ODM support
✔ Custom sizes and cutting
✔ Wholesale and distributor programs
✔ Fast delivery
Message our team to request samples, pricing, or technical details.